This past weekend, I found myself at the intersection of my cooking hobby and my other hobby: living history. At the recent Fire Arts Symposium near St. Louis, I took a class on making “Kettle Worms” (Viking-age sausage) and learned the process for making this dish with period tools over open coals. Who wouldn’t want to eat sausage like a Viking?
Let’s be clear: I’m piggy-backing off of the research done by my friend Cara Watters, who taught the class based on what she learned from Daniel Serra and Hanna Tunberg in their book, An Early Meal: A Viking Age Cookbook & Culinary Odyssey (Chronocopia Publishing, 2013).
There is a reference to kettle worms in the Icelandic Saga of Cormac the Skald, in which a character named Narfi uses the term to describe boiled black pudding. There is no blood in these sausages, but they are boiled. If you are cooking with (or for) kids, and you want to gross them out, go ahead and call them kettle worms. It could be fun. If they refuse to eat them, that’s more sausage that you don’t have to share!
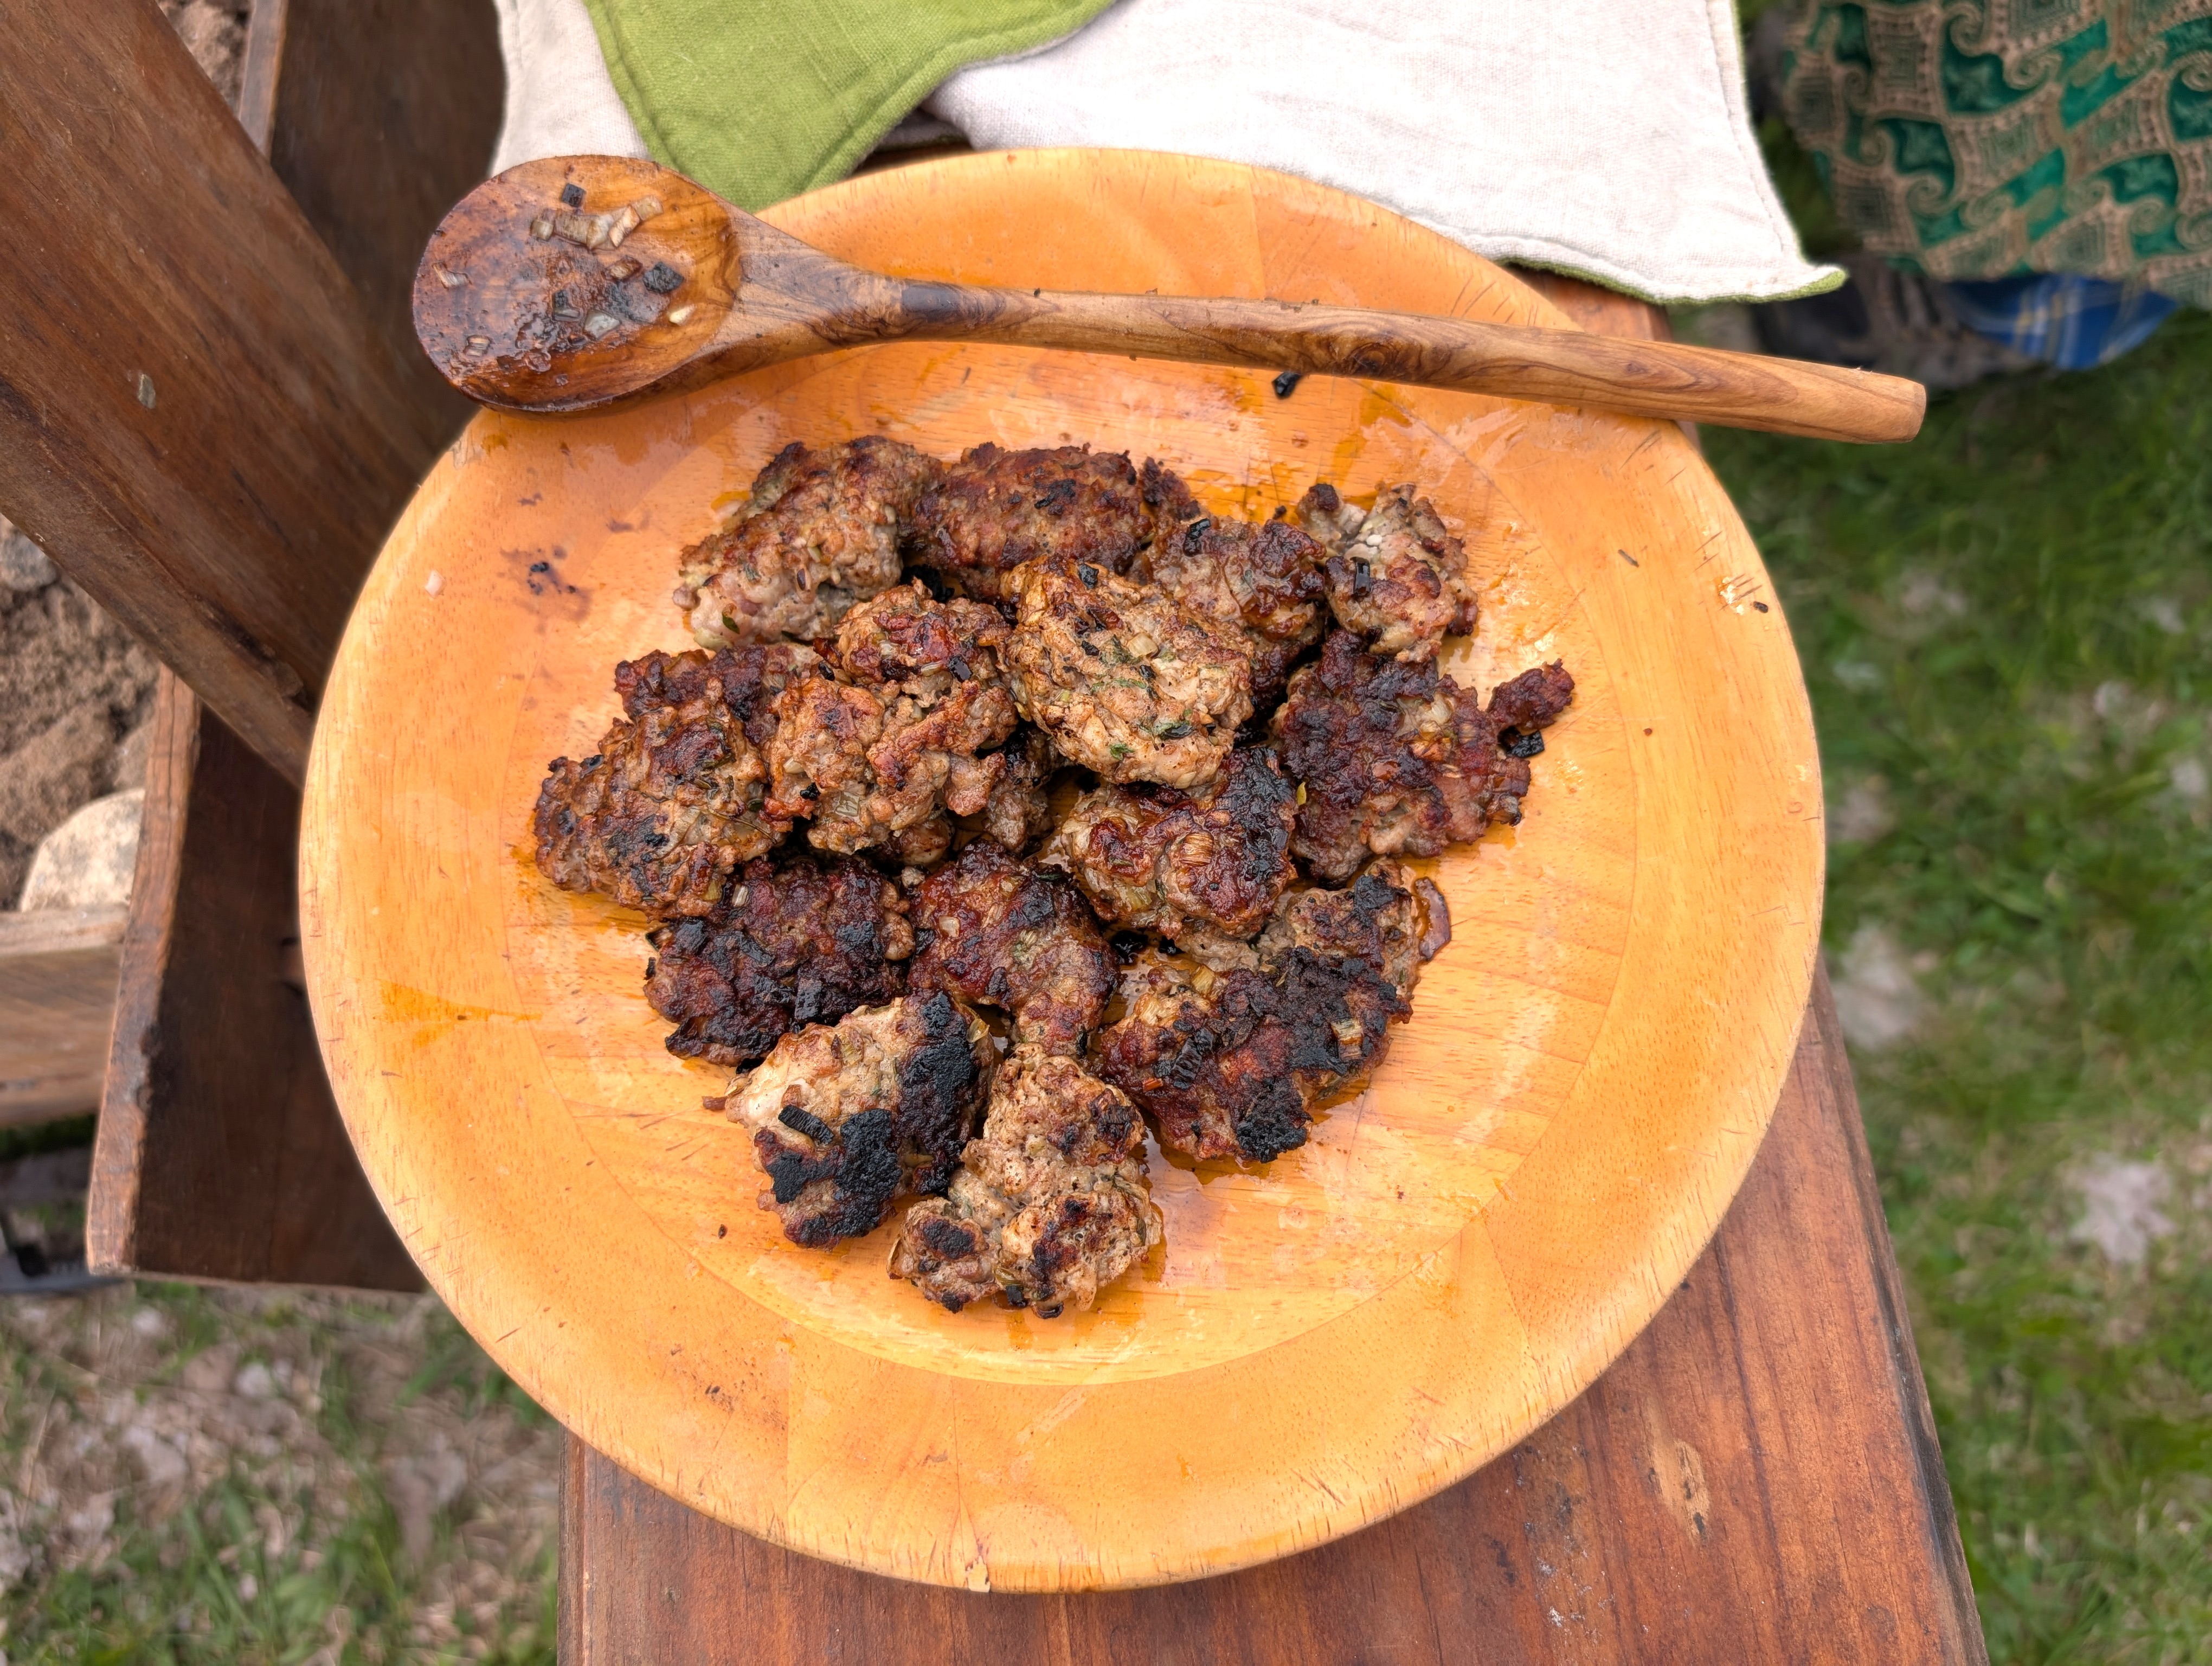
Compared to more modern sausage recipes, the seasoning in this version is very simple, yet surprisingly flavorful. It consists of three types of meat (pork, beef, and bacon), leeks, and thyme. Historically, it was boiled, though you can also smoke it or fry/grill if you prefer. I found that boiling didn’t impart as much of a smoky flavor as you’d get if you smoke the sausages. The patties we made from the sausage mixture gained a bit of smoke from cooking over an open fire, plus some flavor from browning the meat. As such, I’m suggesting an optional addition of liquid smoke if you know you won’t get smoke in your sausages otherwise and really want that flavor.
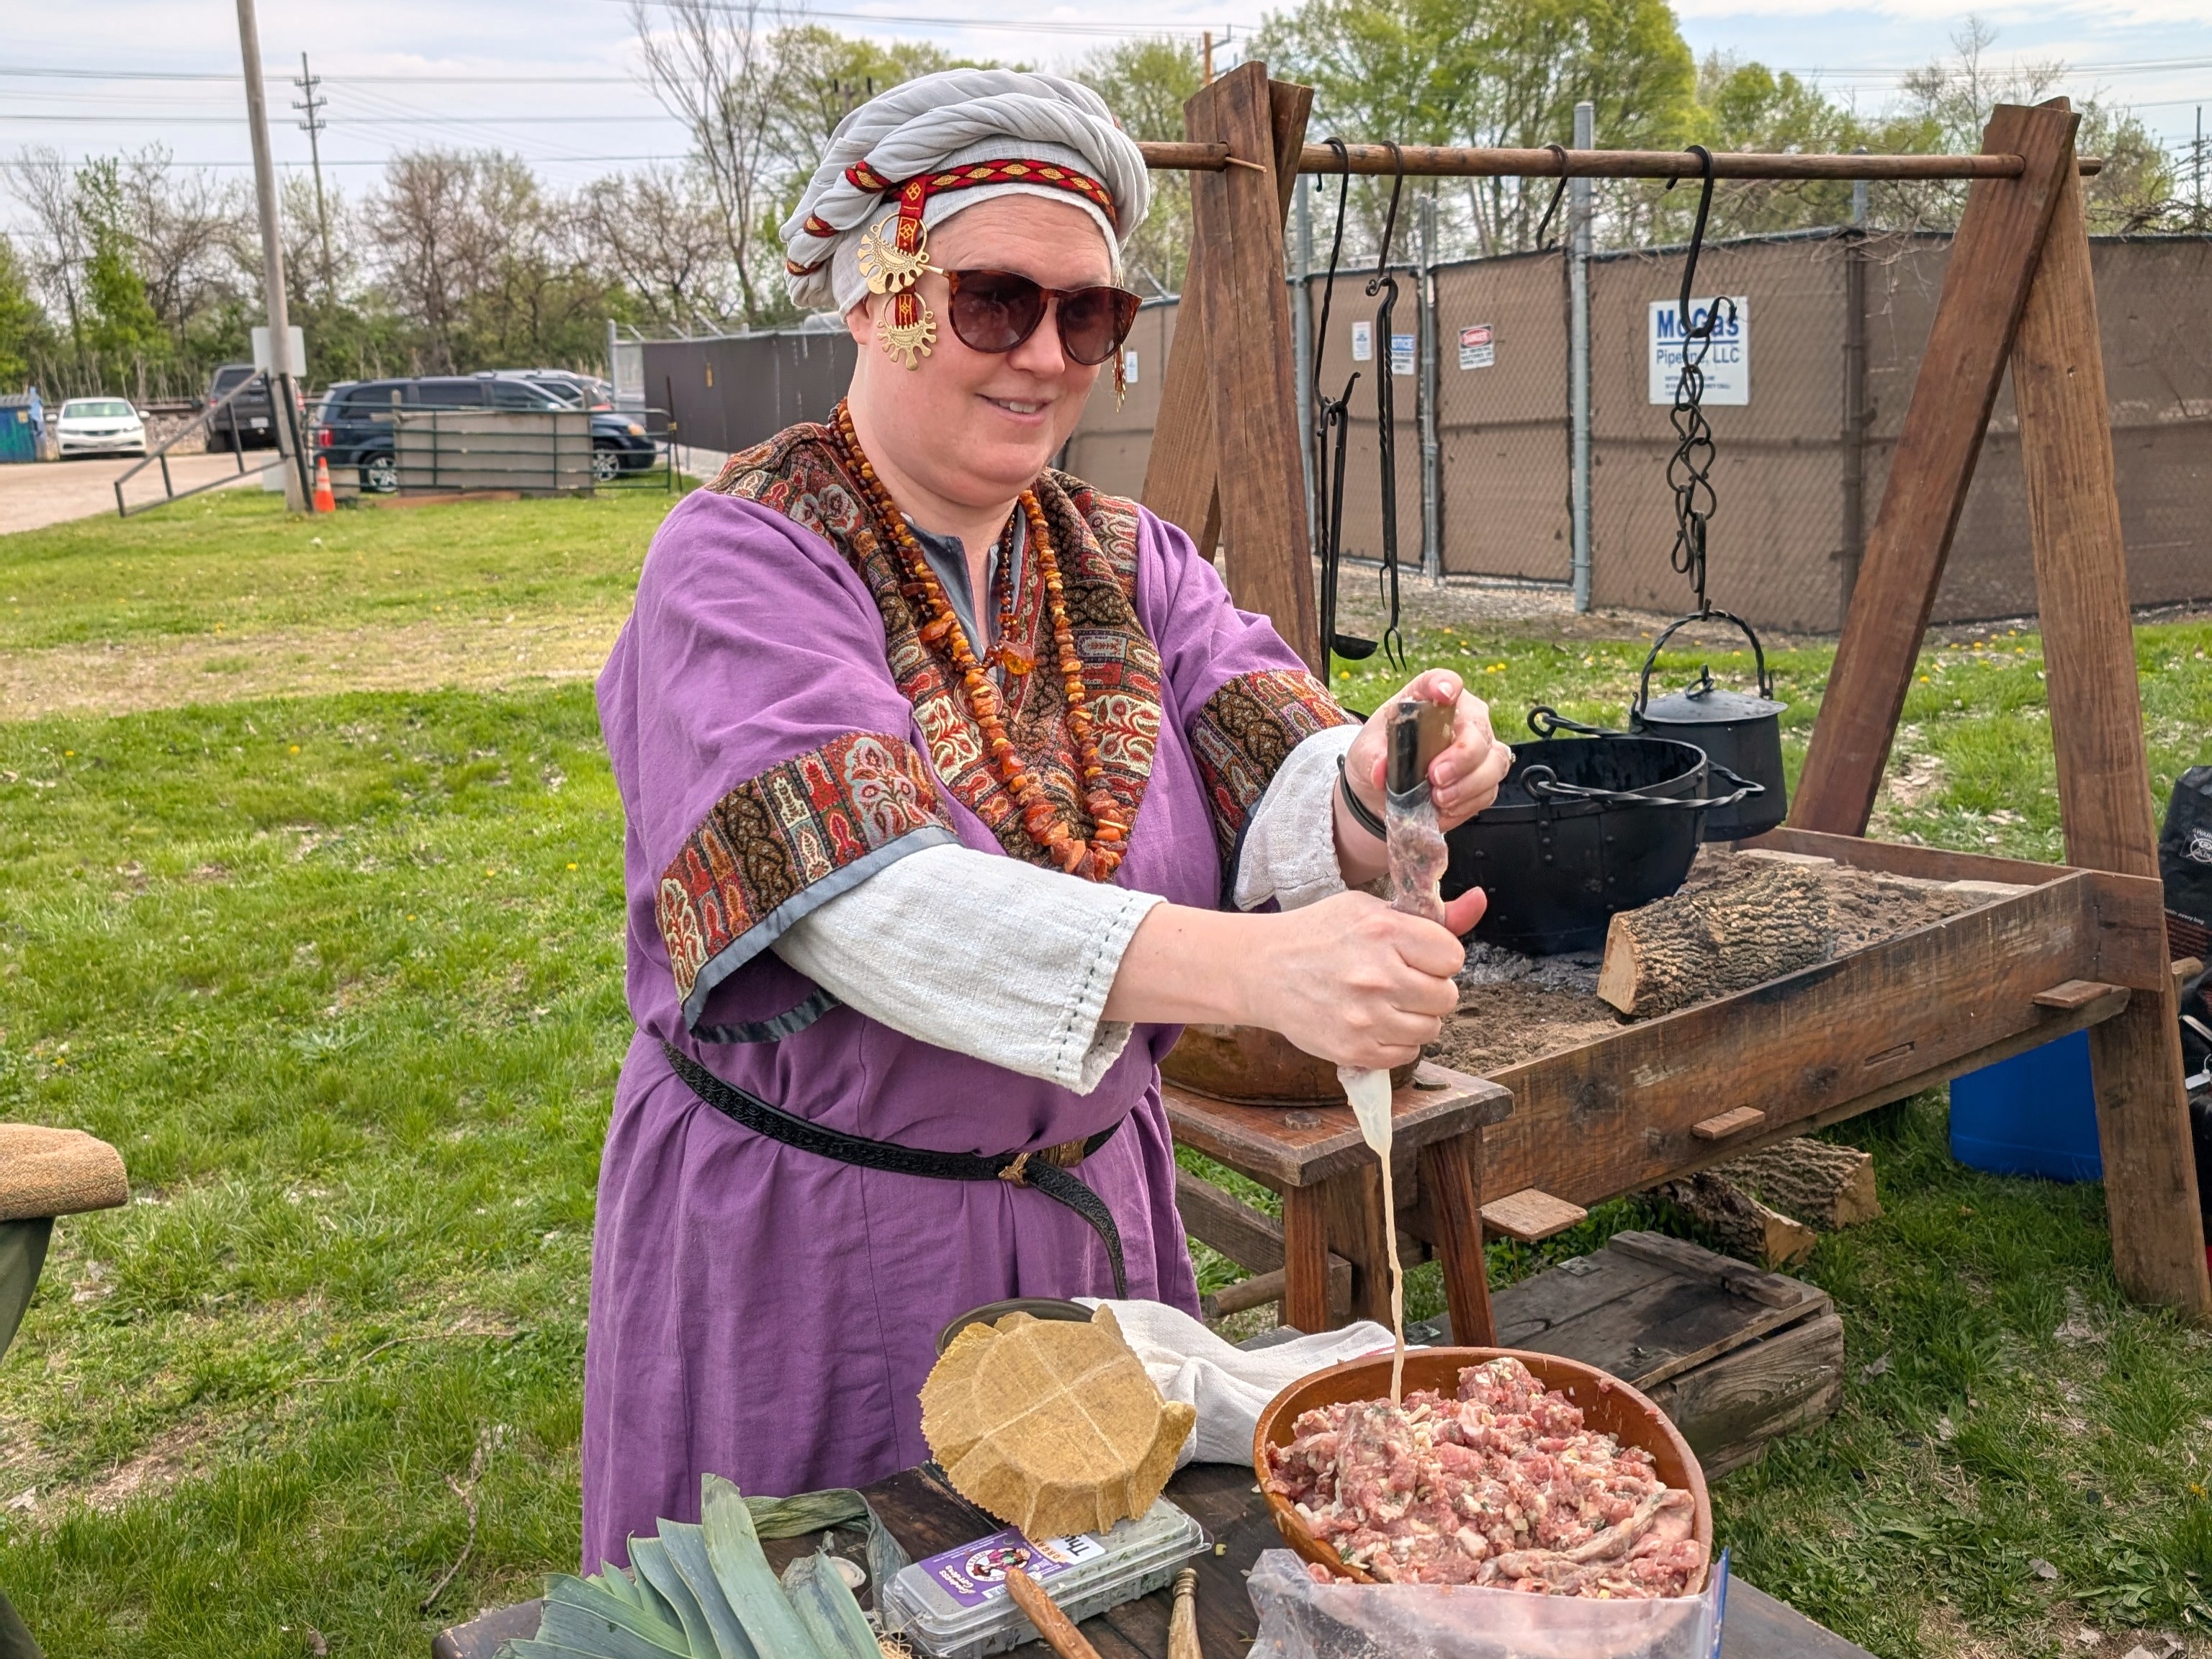
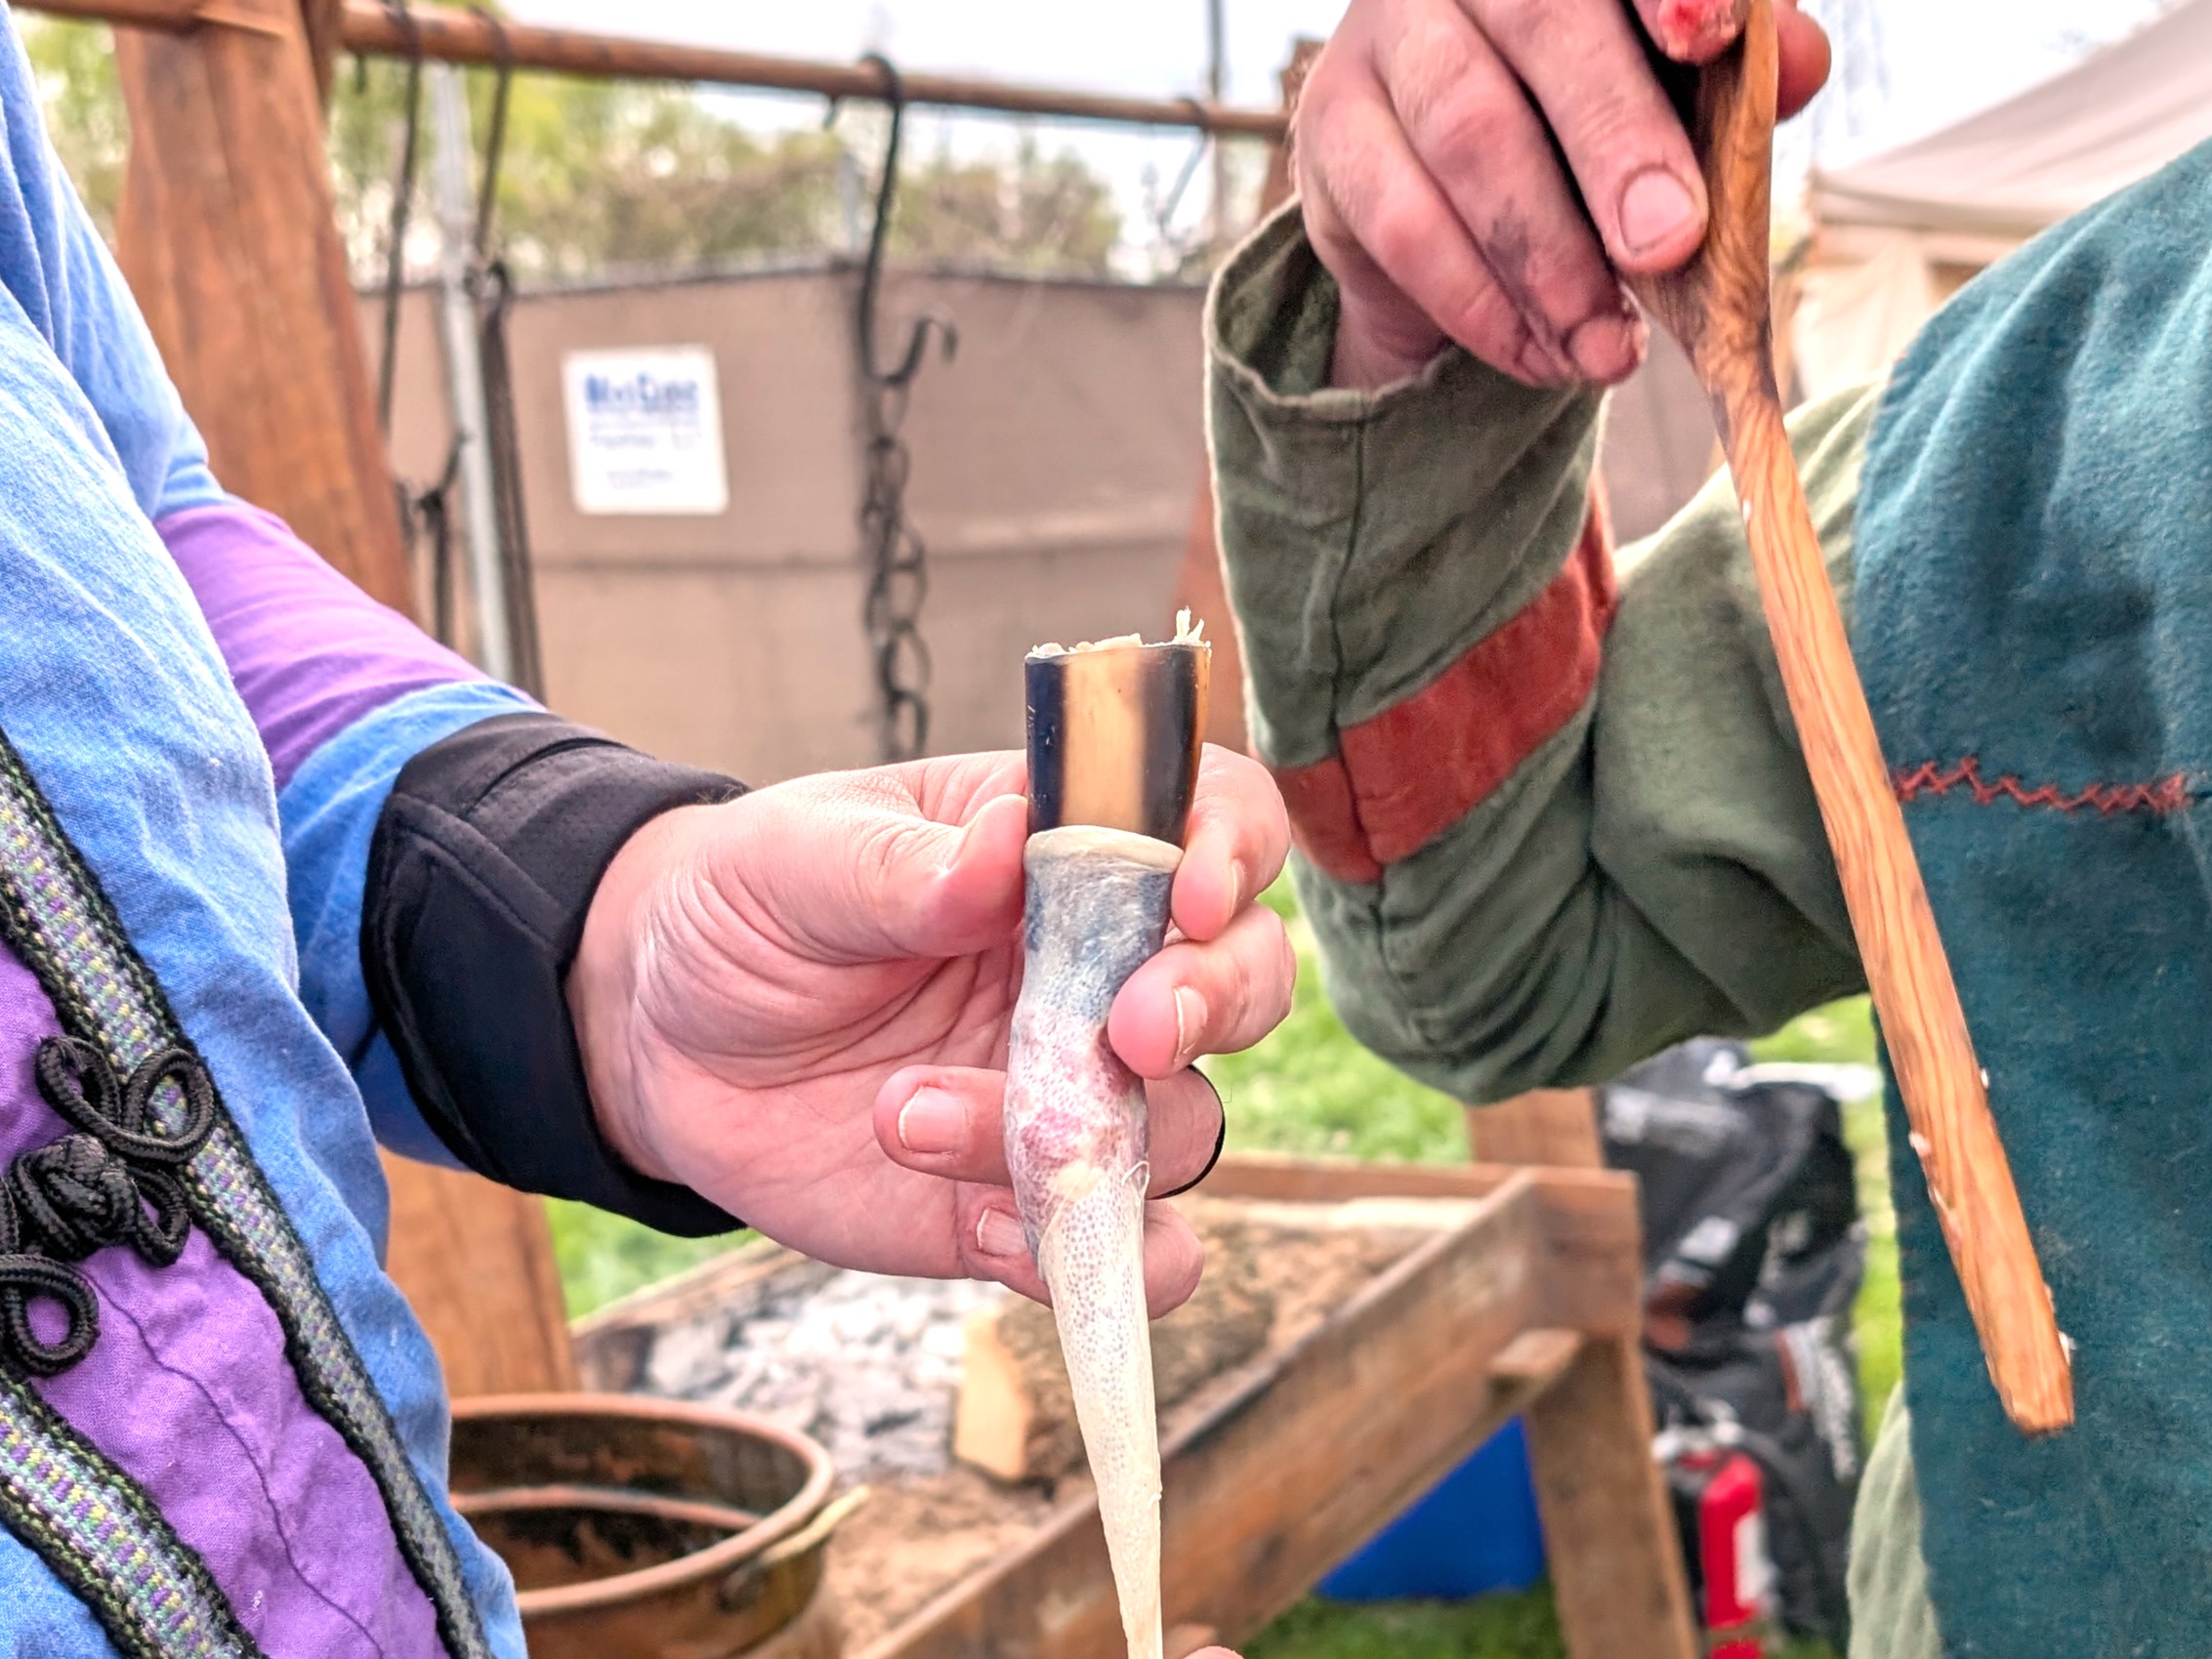
To make the sausages, you could use modern equipment to stuff them, but if you want to stuff sausage like a Viking (or, more specifically, a Viking-age Norse cook), you’ll need to forego the KitchenAid. The period method was to use the sawed-off tip of a cow’s horn — it should be a tube roughly 3 inches with a hole on each end, sanded smooth. If you don’t have easy access to this type of thing, a wide-mouthed tip for a piping bag will also work.
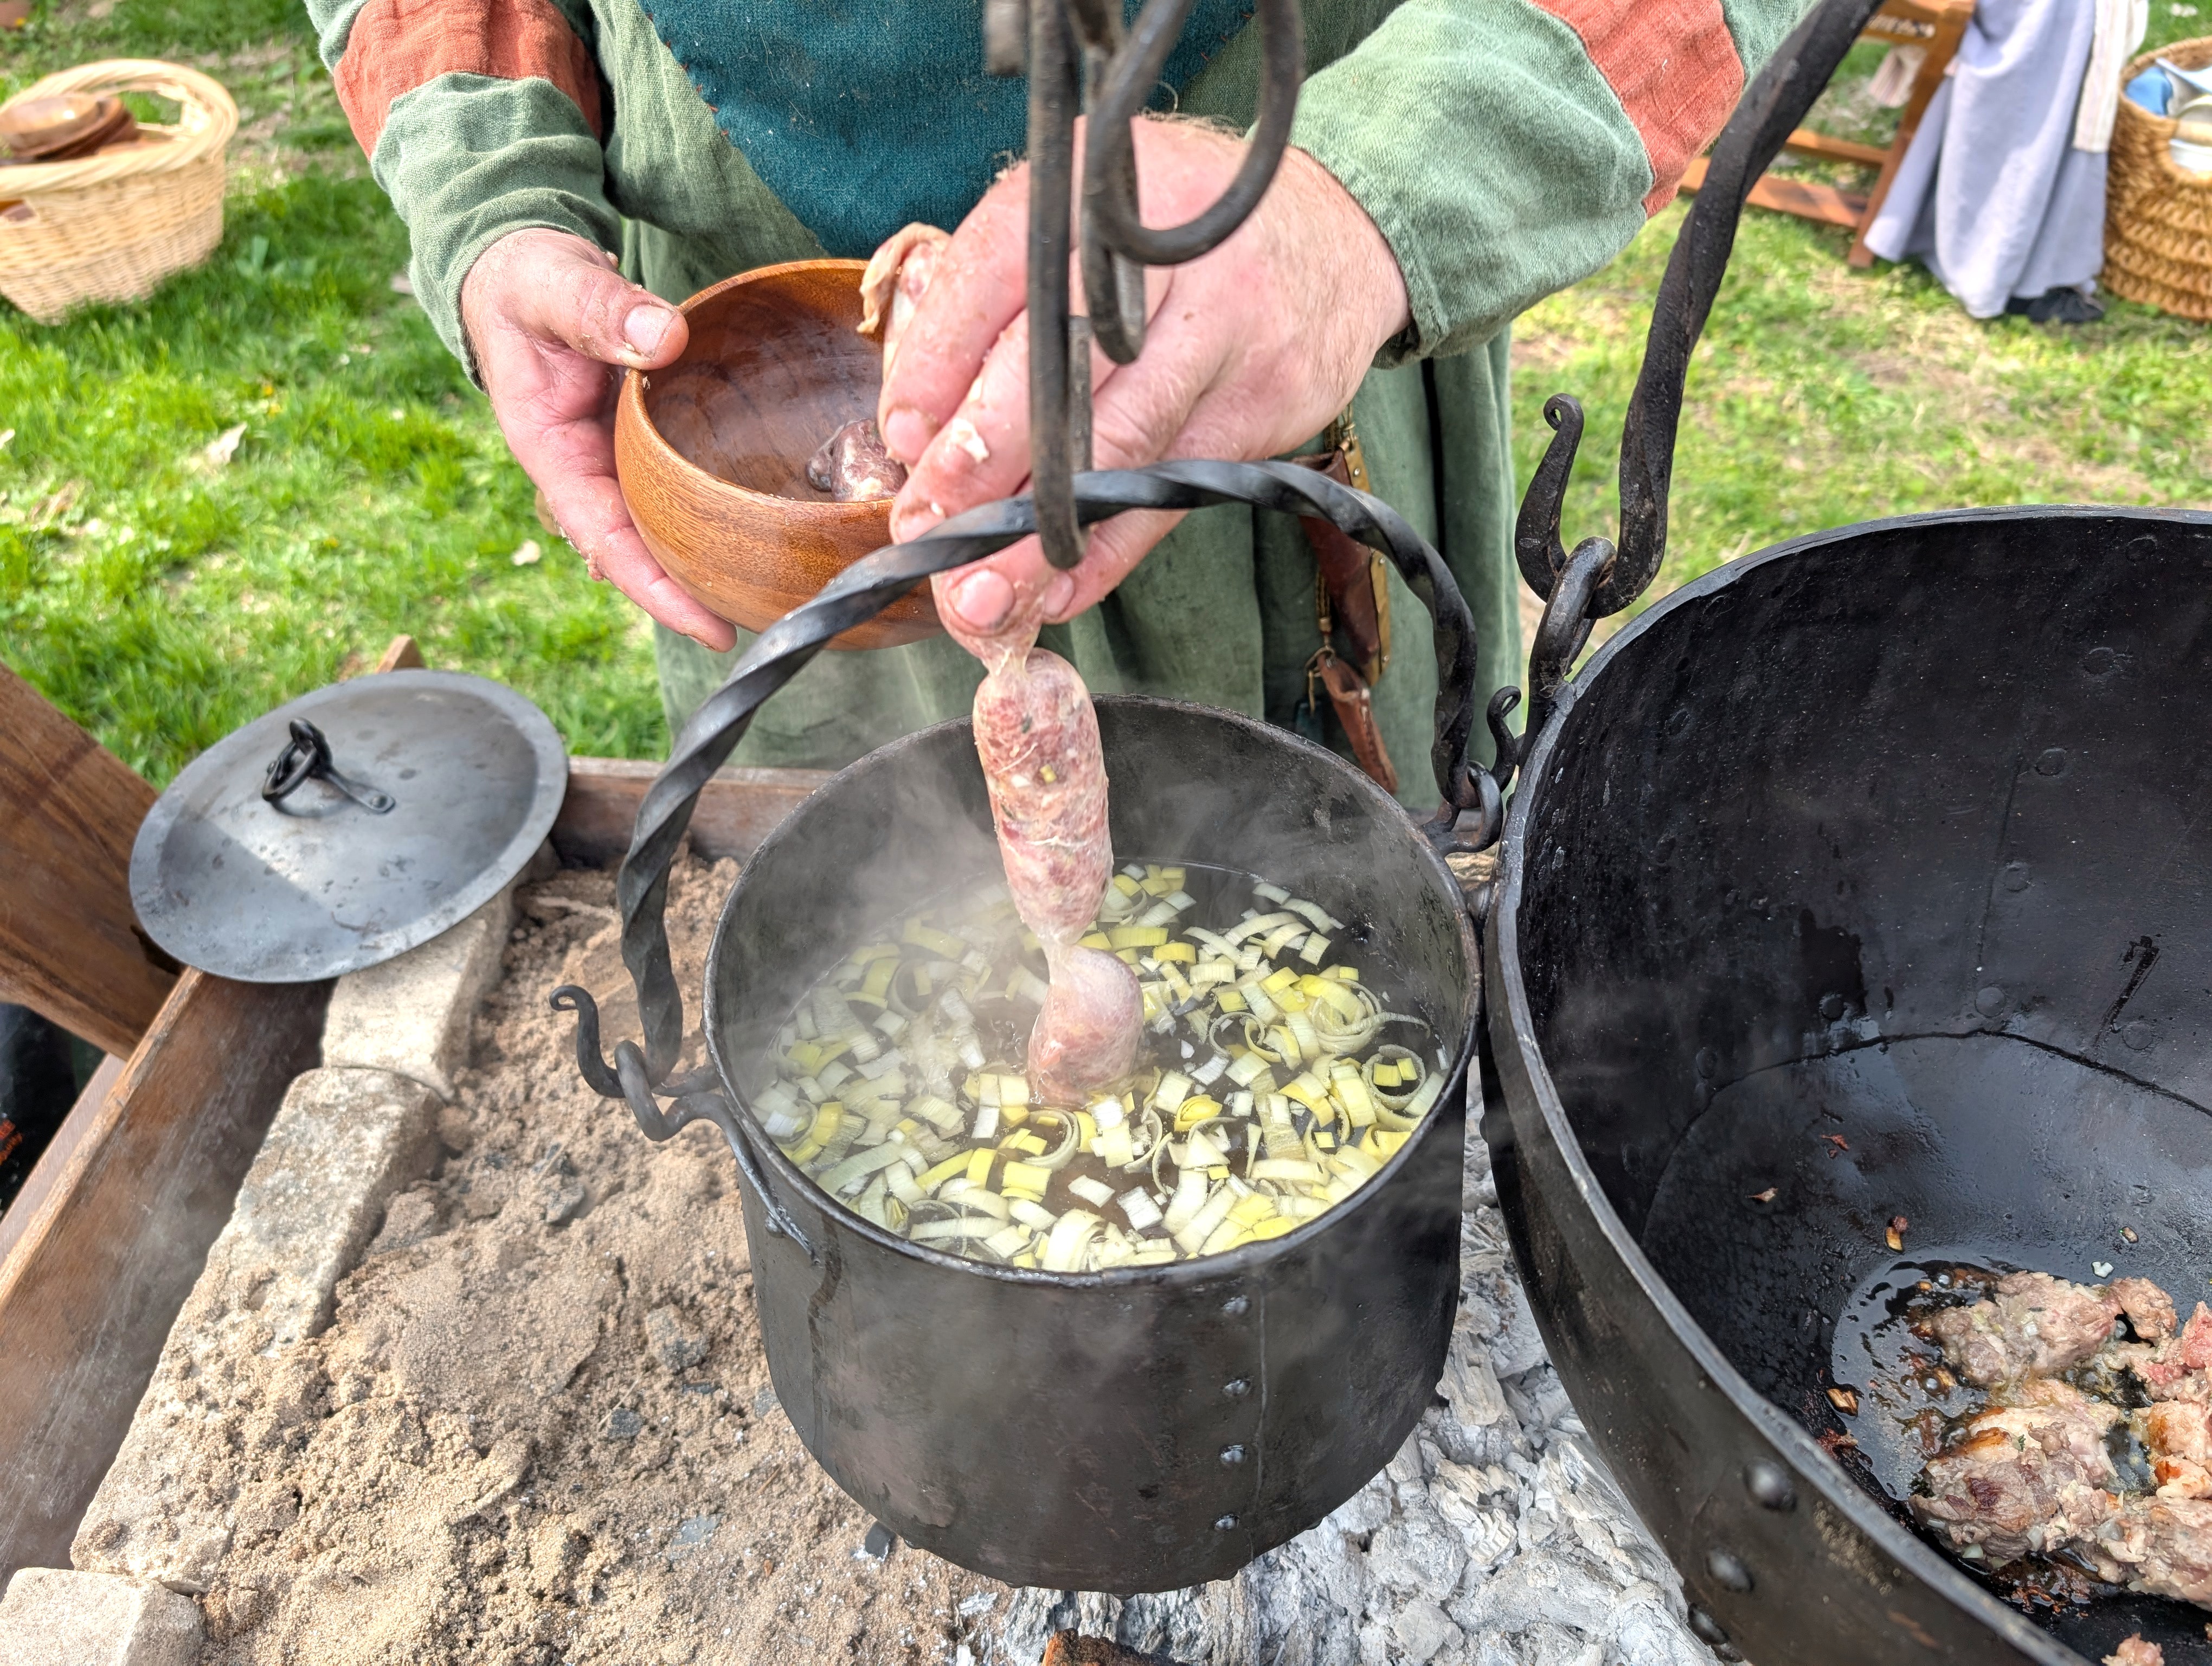
Then, the trick is to find the hole at the end of the casing and slide it onto the narrower end of the horn. Once the guys in our class decided it reminded them of applying a condom, I was happy to let them take over this process and fade into the background for a while. DO NOT BLOW AIR INTO THE CASING, especially if you tie a knot at the other end. You’re going to have air trapped between the knot and the meat and the casing will rip and ruin all the work you’ve put into it.
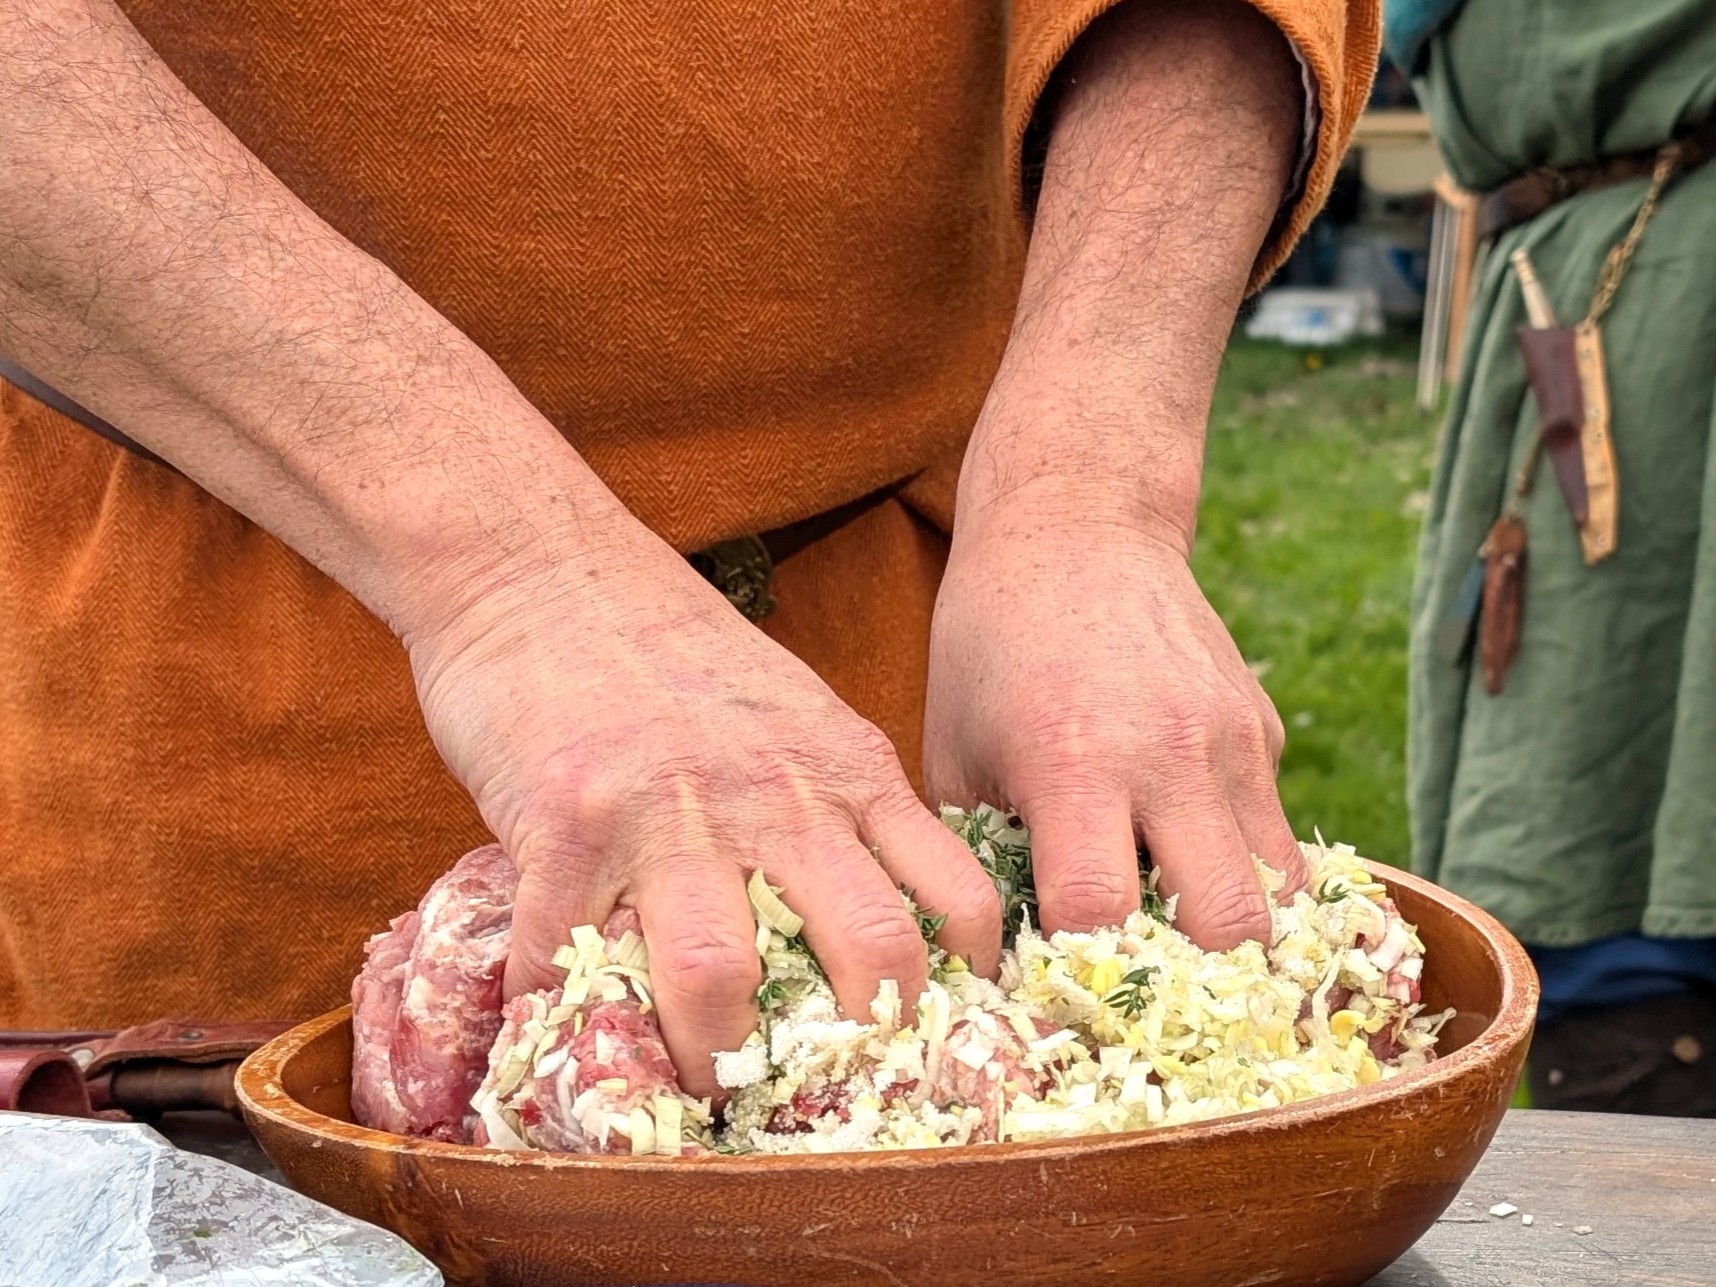
We tried using the wooden handle of a spoon to push the meat into the casing, but this had a tendency to rip holes in the casing. I found it a lot more effective to simply get my finger in there and push. Once you get the casing fully stuffed below the horn, squeeze it down the casing (see top photo) until it’s firm at the bottom, then twist it a few inches from the end. This makes your first sausage. As you add more links of sausage, form each twist in different directions (clockwise vs. counter-clockwise). This apparently does something to the physical property of sausage links that keeps them from unraveling, though I can’t explain the science of it. Trust in the sausage magic.
12 oz. ground pork
12 oz. ground beef
6 oz. bacon, minced
3 1/3 tbsp. fresh or dried thyme
1 c. leek, minced (use the white part, not the green)
Optional: 1 tsp. liquid smoke (if you aren’t going to smoke or cook the sausages over fire)
Sausage casings
Mince the bacon, leek, and thyme as finely as possible.
Work the meat and herbs together, kneading it like a dough. If you are not planning to smoke the meat or cook it over an open fire, you can add the liquid smoke if you still desire a smoky flavor. Mix until all combined.
Immerse the sausage casings in hot water for 10 minutes, then rinse thoroughly in cold water. Gently find the hole at one end of a casing and slide it onto the horn. Tie a knot an inch or two away from the other end. Do not blow air into the casing.
Take a meatball-sized amount of the meat paste and put it into the horn. Using a wooden spoon handle or your finger, push the paste down into the casing. (A spoon handle will take some finesse to prevent it from ripping the casing, so be careful if you go this route. Remember that you can always wash your hands later!)
Repeat this step to fill the casing. As the top of the casing gets full, use your hand to squeeze the paste further down until the bottom fills up.
Make a clockwise twist roughly 3.5 to 4 inches from the bottom to create your first link. Twist the second link counter-clockwise; keep alternating directions for each link. If you get air pockets in your sausage, prick them with a needle.
Hang the sausages to dry for an hour or two (or else toss them into a pot of boiling water immediately).
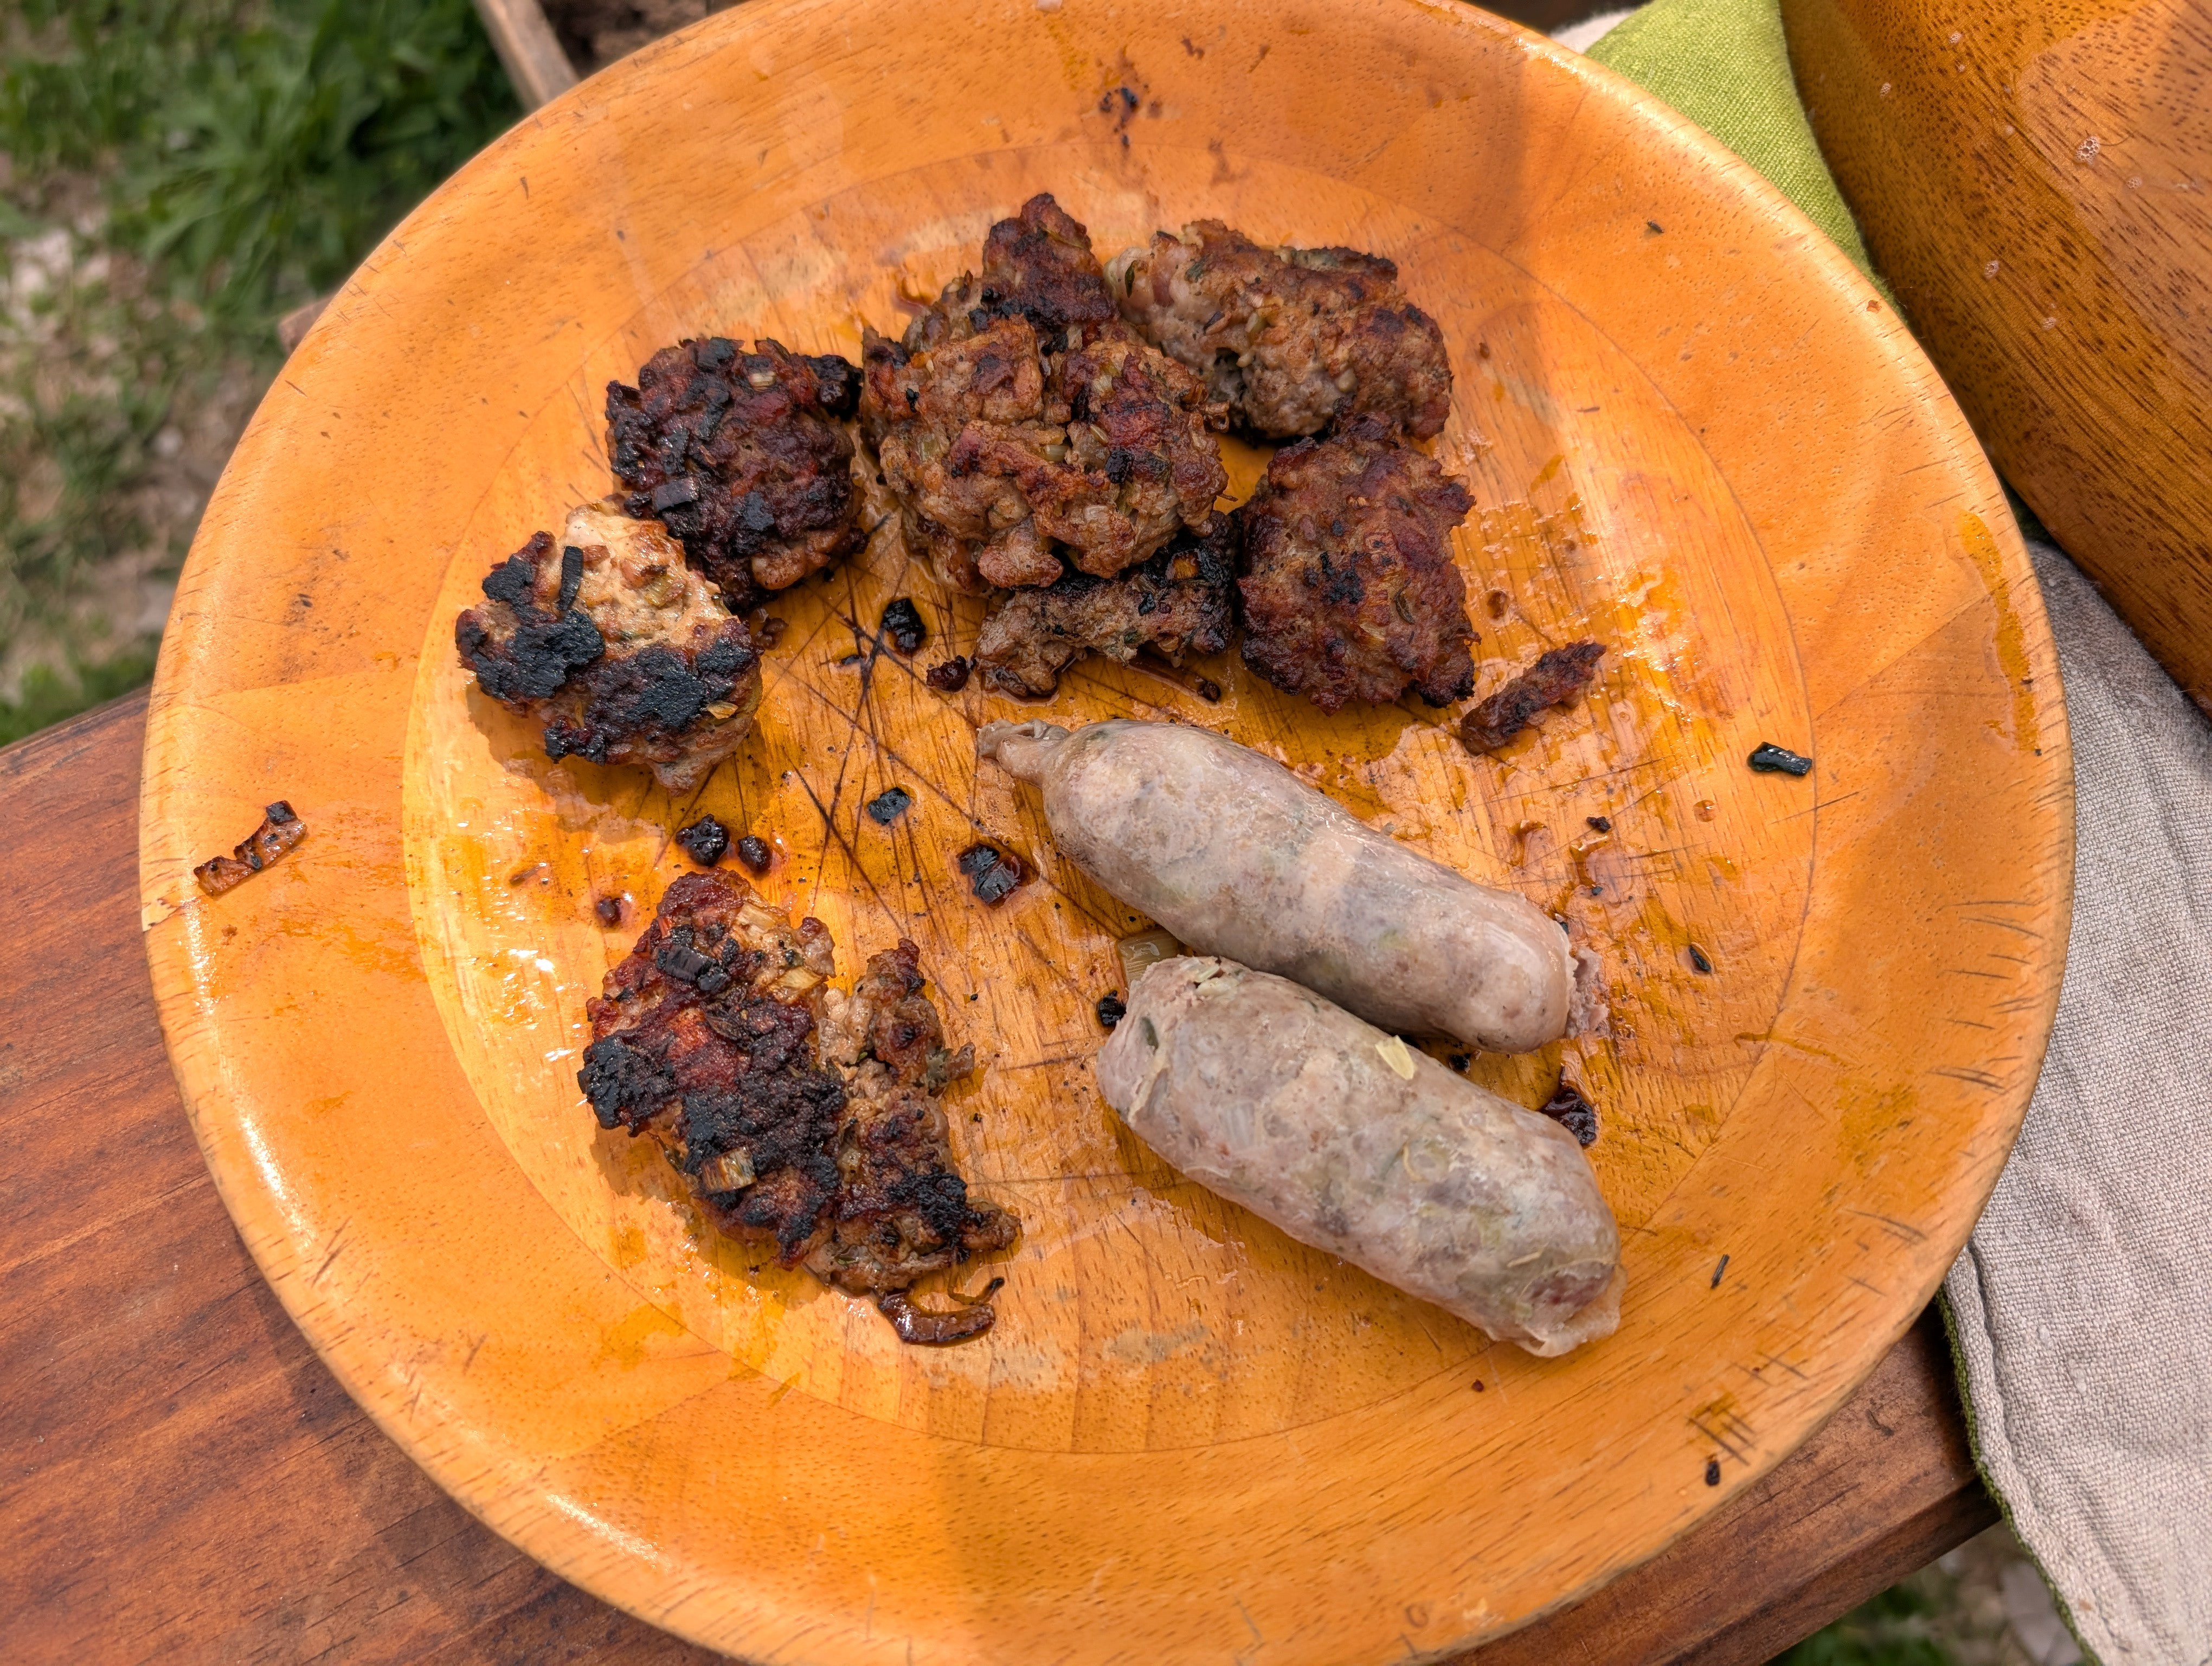
The period cooking methods are to either boil them for roughly ~15 minutes, or hang them over an open flame and smoke them.
If you lose patience with stuffing the sausages, you can always make flat patties and sauté them in a skillet, no oil required. These are also delicious and have the added flavor from browning the meat.
Viking sausage if you don’t want to stuff casing.
